Kļūda “ Neapstrādāts win32 izņēmums radās * lietojumprogrammas_nosaukums * ” parasti rodas, kad lietotājs mēģina palaist programmu, kas tika izveidota Visual Studio. Lielākā daļa ziņoto šīs kļūdas gadījumu ir saistīti ar Uplay, Internet Explorer un vairākām mantotajām spēlēm, kas sākotnēji tika izveidotas vecākām Windows versijām.

Piezīme . Lūk, kā novērst Runtime bibliotēku, kas saistīta ar Visual C ++.
Kas izraisa kļūdu “Neapstrādāts izņēmums jūsu lietojumprogrammā” sistēmā Windows?
Šai problēmai ir vairāki vienkārši cēloņi, un problēmu var efektīvi novērst, ja spējat atpazīt savu scenāriju, vienkārši balstoties uz pareizā cēloņa noteikšanu. Pārbaudiet zemāk esošo sarakstu:
- Iespējams, ka vainīgs ir jūsu antivīruss. Ir zināms, ka daži pretvīrusu rīki, piemēram, Panda Antivirus, ir izraisījuši šo problēmu, tāpēc noteikti nomainiet tos.
- Iespējams, darbojas noteiktas programmas vai ļaunprātīga programmatūra - ja datorā darbojas instalēta programma vai ļaunprātīga programmatūra, iespējams, vēlēsities no tās atbrīvoties. Pārliecinieties, ka sākat tīru sāknēšanu, lai redzētu, vai tas ir pareizs iemesls.
- Microsoft .NET Framework instalēšana ir bojāta - ja tā pamatfaili ir bojāti, varat mēģināt labot tā instalēšanu, instalēt jaunāku versiju vai veikt SFC skenēšanu.
- Skriptu atkļūdošana ir iespējota, izmantojot reģistru - kā izrādās, konkrēta reģistra atslēga var veicināt šīs problēmas parādīšanos. Lai par to rūpētos, jums būs jāatspējo skriptu atkļūdošana, izmantojot reģistra atslēgas.
- Piekļuves pārkāpums Msvcr92.dll - avota bufera pārsniegšana vai nepareizs galīgais baits ir arī iespējamie šīs problēmas cēloņi. Lai tos novērstu, jums būs jāinstalē visi gaidītie Windows atjauninājumi.
- Ubisoft palaišanas programmas reģistra atslēgas dzēšana - ja mēģinot palaist Uplay.exe tiek parādīta šī kļūda, tas ir saistīts ar kļūdu ar Ubisoft Game Launcher. Šo problēmu var atrisināt arī, izmantojot reģistru, izdzēšot šai palaidējai piederošo vērtību.
- Sistēmas failu bojājums - šo problēmu var izraisīt arī sistēmas failu neatbilstība. Vieglu korupciju var atrisināt, veicot vienkāršu DISM un SFC skenēšanu. Smagākos apstākļos tīrai instalēšanai vai labošanai vajadzētu palīdzēt atrisināt problēmu.
1. risinājums: instalējiet visus gaidītos Windows atjauninājumus
Viens no visizplatītākajiem cēloņiem, kas galu galā izraisīs kļūdu “ Notika neapstrādāts win32 izņēmums ”, ir lietojumprogramma, kas tika izveidota x64 platformai, izmantojot MSVCR90.DLL, kas izsauc funkciju strncpy.
Šajā gadījumā Msvcr92.DLL failā izraisītais piekļuves pārkāpums, visticamāk, liks lietojumprogrammai pārtraukt atbildēt strncpy funkcijā. Avota bufera pārsniegšana vai nepareizs gala baits ir visticamākie šīs problēmas cēloņi.
Par laimi, Microsoft jau ir informēta par šo problēmu un ir izlaidusi šai problēmai labojumfailu, kas to automātiski novērsīs. Lai to izmantotu, viss, kas jums jādara, ir atjaunināt OS versiju uz jaunāko pieejamo versiju.
Piezīme. Šis labojumfails tika ievietots Visual Studio 2008 pārskatījumā, kuru Windows automātiski atjaunina, tāpēc tālāk norādītās darbības ir universālas un tām vajadzētu darboties neatkarīgi no jūsu OS versijas.
Šeit ir īss ceļvedis par Windows versijas atjaunināšanu uz jaunāko versiju, lai instalētu Visual Studio 2008 labojumfailu un atrisinātu problēmu:
- Nospiediet Windows taustiņu + R, lai atvērtu dialoglodziņu Palaist . Pēc tam ierakstiet “ms-settings: windowsupdate” un nospiediet taustiņu Enter, lai atvērtu lietotnes Iestatījumi cilni Windows atjaunināšana .
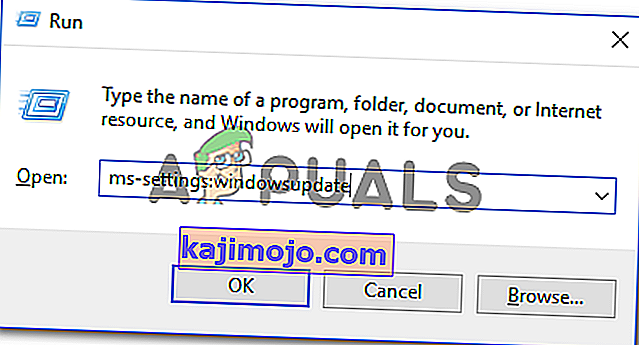
Piezīme: Ja rodas šī problēma operētājsistēmā Windows 7 vai Windows 8.1. tā vietā izmantojiet komandu 'wuapp' .
- Kad esat paspējis nokļūt Windows atjaunināšanas ekrānā, vispirms noklikšķiniet uz Pārbaudīt atjauninājumus . Pēc tam sāciet izpildīt ekrānā redzamos norādījumus, lai pabeigtu katra Windows atjauninājuma instalēšanu, kas pašlaik gaida instalēšanu.

Piezīme. Paturiet prātā, ka ir svarīgi instalēt katru atjauninājumu, ne tikai kritisko. Tā kā labojumfails ir iekļauts Visual Studio pārskatā, attiecīgais atjauninājums, iespējams, atrodams sadaļā Neobligāti, tāpēc noteikti instalējiet tos visus.
- Ja tiek parādīts aicinājums restartēt, pirms tiek dota iespēja instalēt katru pieejamo atjauninājumu, dariet to. Pēc nākamās startēšanas beigām noteikti atgriezieties tajā pašā ekrānā, lai pabeigtu pārējo atjauninājumu instalēšanu.
- Kad katrs gaidošais atjauninājums ir instalēts, pēdējo reizi restartējiet datoru un pēc tam atkārtojiet darbību, kas iepriekš izraisīja kļūdas ziņojumu, lai redzētu, vai problēma ir novērsta.


Gadījumā, ja jūs joprojām sastopat kļūdu “ Notika neapstrādāts win32 izņēmums ”, pārejiet uz nākamo tālāk norādīto metodi.
2. risinājums: nomainiet antivīrusu
Bezmaksas antivīrusu rīki var būt diezgan noderīgi, un viņi var paveikt savu darbu, aizsargājot jūsu datoru, bet dažreiz tie vienkārši nesader ar citām lietām jūsu datorā. Apsveriet iespēju nomainīt antivīrusu, ja tas rada šo problēmu, kamēr tas ir ieslēgts.
- Noklikšķiniet uz izvēlnes Sākt un , meklējot to, atveriet Vadības paneli . Varat arī noklikšķināt uz zobrata ikonas, lai atvērtu iestatījumus, ja izmantojat Windows 10.
- Vadības panelī augšējā labajā stūrī atlasiet Skatīt kā - kategoriju un sadaļā Programmas noklikšķiniet uz Atinstalēt programmu.

- Ja izmantojat lietotni Iestatījumi, noklikšķinot uz Lietotnes , nekavējoties jāatver visu datorā instalēto programmu saraksts.
- Vadības panelī vai iestatījumos atrodiet pretvīrusu rīku un noklikšķiniet uz Atinstalēt .
- Atveras tā atinstalēšanas vednis, tāpēc izpildiet norādījumus, lai to atinstalētu.

- Noklikšķiniet uz Pabeigt, kad atinstalētājs ir pabeidzis procesu, un restartējiet datoru, lai redzētu, vai joprojām parādās kļūdas. Pārliecinieties, ka esat izvēlējies labāku antivīrusu opciju .
3. risinājums: palaidēja reģistra vērtības dzēšana (ja piemērojams)
Ja mēģināt palaist Uplay.exe vai citu lietojumprogrammu, kas pieder Ubisoft, rodas kļūda “ Neapstrādāts win32 izņēmums ”, visticamāk, tā ir kļūda ar viņu Ubisoft Game Launcher.
Kā izrādās, šķiet, ka tā ir plaši izplatīta problēma operētājsistēmā Windows 10, it īpaši to lietotāju vidū, kuriem vienlaikus ir instalēti gan Steam, gan Uplay.
Vairākiem ietekmētajiem lietotājiem, ar kuriem mēs cenšamies atrisināt šo problēmu, ir izdevies to novērst, izmantojot reģistra redaktoru, lai atrastu palaidējam piederošo virknes reģistra vērtību un to izdzēstu. Tas it kā novērš konfliktu, ļaujot abām lietojumprogrammām pareizi darboties zem vienas mašīnas.
Šeit ir īss ceļvedis par reģistra vērtības dzēšanu, kas saistīta ar Uplay palaidēju:
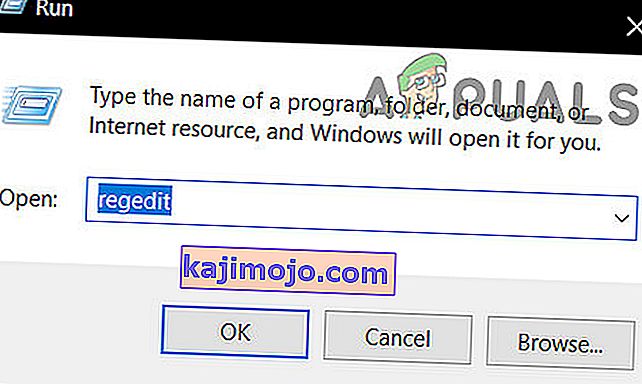
- Nospiediet Windows taustiņu + R, lai atvērtu dialoglodziņu Palaist . Tekstlodziņā ierakstiet “regedit” un nospiediet taustiņu Enter, lai atvērtu reģistra redaktoru . Kad uzvedne UAC (User Account Control) prasa , ievadiet Jā, lai piešķirtu administratīvās privilēģijas.
- Kad esat reģistrācijas redaktorā , izmantojiet loga kreiso sadaļu, lai virzītos uz šo vietu:
Dators \ HKEY_LOCAL_MACHINE \ SOFTWARE \ WOW6432Node \ Ubisoft
Piezīme. Varat tur navigēt manuāli vai arī ielīmēt atrašanās vietu tieši navigācijas joslā augšpusē un nospiediet Enter, lai tajā uzreiz nokļūtu.
- Kad jums ir izdevies nokļūt pareizajā vietā, pārejiet uz leju uz ekrāna labajā pusē, ar peles labo pogu noklikšķiniet uz palaidēja un izvēlieties Dzēst, lai atbrīvotos no tā.

Piezīme: Ja jūs varat izdzēst atslēgu, veiciet tālāk norādītās darbības, kā pārņemt reģistra atslēgu īpašumtiesības.
Note: After you delete it, the launcher will be forced to create a new Launcher string value with fresh data, which should resolve the issue.
- Once the key has been deleted, close Registry Editor and restart your computer.
- At the next computer startup, repeat the action that was previously causing the “An unhandled win32 exception occurred‘ error and see if the problem is resolved.


In case the same issue is persisting, move down to the next potential fix below.
Solution 4: Reset Internet Explorer (if applicable)
Another potential instance with the potential of creating this issue is a series of corrupted Internet Explorer (IE). If you’re encountering the “An unhandled win32 exception occurred in iexplore.exe’ error chances are it appears after a failing script.
To fix this issue, you should reset your Internet Explorer settings via the Internet Options menu. This operation was confirmed to be successful by a lot of users that were dealing with this error.
Here’s a quick guide on resetting Internet Explorer in order to resolve the “An unhandled win32 exception occurred‘ error:
- Ensure that Internet Explorer, Edge or any other associated instance is turned off and no background process is running.
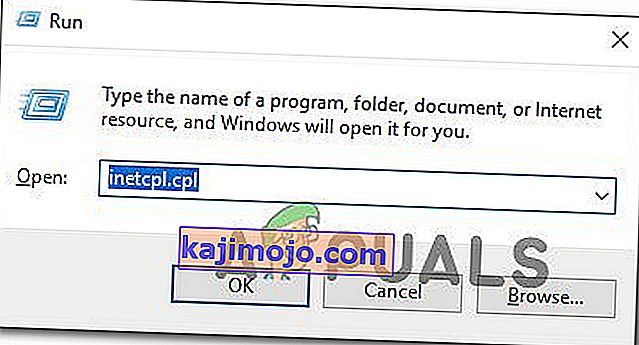
- Press Windows key + R to open up a Run dialog box. Inside the text box, type ‘inetcpl.cpl’ and press Enter to open up the Internet Options menu.
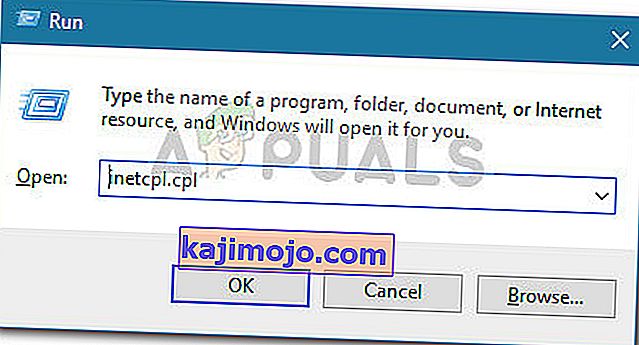
Note: If you are prompted by the UAC (User Account Control), click Yes to grant administrative privileges.
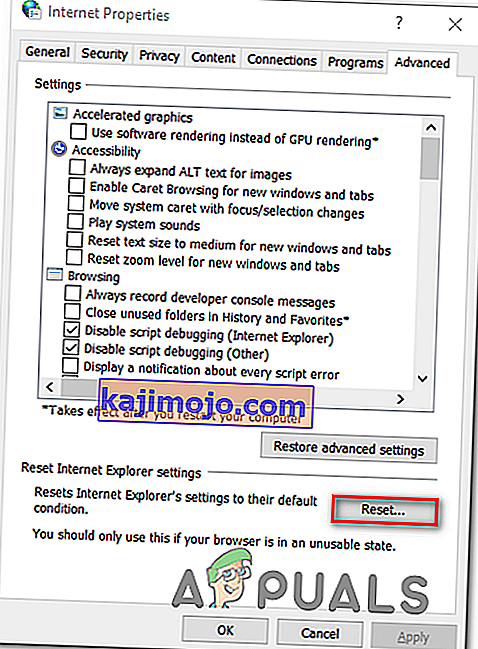
- After you manage to get inside the Internet Properties screen, select the Advanced tab from the horizontal menu at the top. Next, go to the Reset Internet Explorersettings and click on the Reset button.
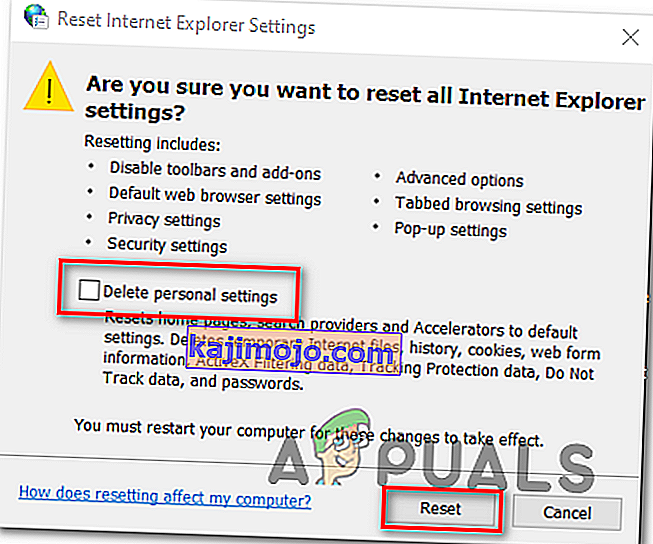
- Once you see the confirmation screen, ensure that the box associated with Delete personal settings is checked, then click on the Reset button.
- Wait until the operation is complete, then restart your machine and see if the issue is resolved at the next computer startup.


In case the same “An unhandled win32 exception occurred in iexplore.exe’ error is still occurring, move down to the next method below.
Solution 5: Disable Script Debugging and associated Registry Keys (if applicable)
If you’re encountering the issue with Internet Explorer on a machine that has VS installed on it, the issue can also occur due when Script Debugging is enabled and the registry entries end up containing corrupted data.
Several affected users that encountered this issue have confirmed that the issue was resolved after they accessed the Internet Options menu to disable Script Debugging and then deleted the associated keys using Registry Editor.
Here’s a quick guide on doing this in order to fix the “An unhandled win32 exception occurred in iexplorer.exe’ error:
- Press Windows key + R to open up a Run dialog box. Next, inside the text box, type ‘inetcpl.cpl’ and press Enter to open up the Internet Options menu. If you are prompted by the User Account Control (UAC), click Yes to grant administrative privileges.
- Once you manage to find yourself inside the Internet Properties screen, use the menu at the top to select the Advanced tab.
- Inside the Internet Properties screen, scroll down through the Settings menu and check the box associated with Disable script debugging (Internet Explorer).
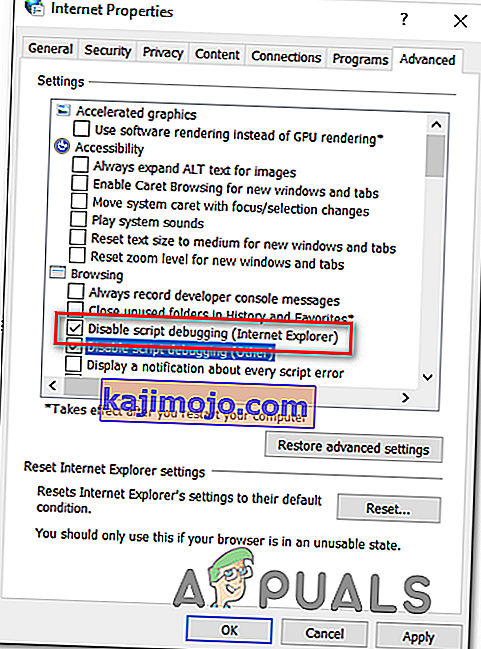
- Once the modification is enforced, hit Apply to save the changes, then close the Internet Properties window.
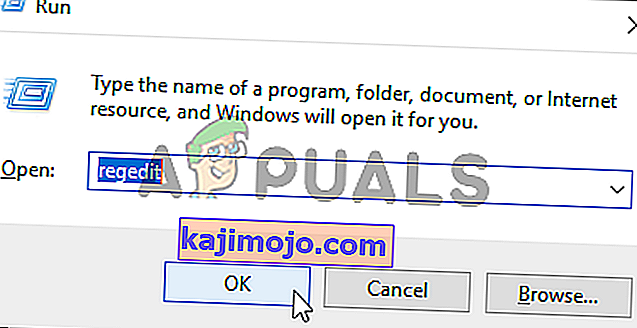
- Press Windows key + R once again to open up another dialog box. This time, type ‘regedit’ and press Enter to open up Registry Editor. You will need to grant admin access, so click Yes when prompted by the User Account Control window.
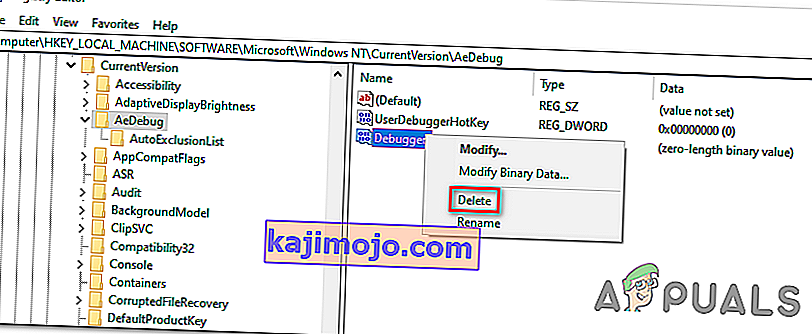
- Inside the Registry Editor, navigate to the following location using the left-hand menu:
HKEY_LOCAL_MACHINE\SOFTWARE\Microsoft\Windows NT\CurrentVersion\AeDebug (32 - Bit Machine) HKEY_LOCAL_MACHINE\SOFTWARE\Wow6432Node\Microsoft\Windows NT\CurrentVersion\AeDebug (64 - Bit Machine)
Note: The location of the file we need to delete is different depending on the Windows version that you’re using. If you have a 32 – bit Windows version use the first location, else, use the second.
- Once you arrive to the correct location, move down to the right-section, right-click on Debugger and choose Delete from the context menu.
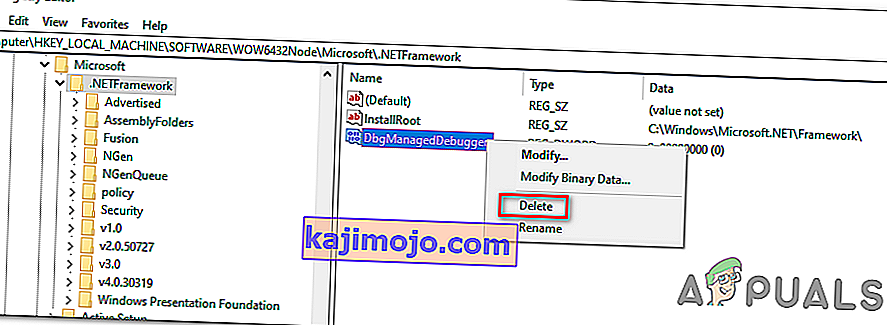
- Once this key is deleted, navigate to this second location:
HKEY_LOCAL_MACHINE\SOFTWARE\Microsoft\.NETFramework\ (32 - Bit Machine) HKEY_LOCAL_MACHINE\SOFTWARE\Wow6432Node\Microsoft\.NETFramework (64 - Bit Machine)
Note: Access the registry key associated with your Windows bit version that you’re using.
- When you arrive at the correct location, move over to the right-hand section and delete the DbgManagedDebugger value by right-clicking on it and choosing Delete from the context menu.
- After you manage to delete the value, close the Registry Editor and restart your computer.
- Once the next startup is complete, see if the same issue is still occurring.


In case the “An unhandled win32 exception occurred’ error is still occurring, move down to the next method below.
Solution 6: Install the Latest Version of NET Framework and Repair it
Having NET Framework installed on your computer is vital and plenty of modern games and programs depend on you having it installed. Before repairing it, follow the steps below in order to install the latest version on your computer.
Navigate to this link and click the red download button in order to download the latest version of the Microsoft .NET Framework. After the download has finished, locate the file you downloaded and run it. Note that you will need to have constant access to the Internet. Follow the instructions on-screen to proceed with the installation.
- After installing the latest version, it’s time to check its integrity. On your keyboard, use the Windows Key + R key combination to open the Run dialog box.
- Type in control.exe and click OK in order to open it.

- Click the Uninstall a Program option and click Turn Windows features on or off. Make sure you locate the .NET Framework 4.x.x entry and make sure it’s enabled. ‘x.x’ marks the latest version available for your operating system.
- If the checkbox next to .NET Framework 4.x.x is not enabled, enable it by clicking the box. Click OK to close the Windows Feature window and reboot the computer.

- If .Net Framework 4.x.x is already enabled, you can repair .Net Framework by clearing the box and rebooting the computer. After the computer has restarted, re-enable .Net Framework and restart the computer again.
Solution 7: Perform a Clean Boot
There are various other programs and services which can affect the proper functionality of the Microsoft .NET Framework suite. In most cases, the cause is the antivirus you have installed and you can try disabling it to see if the error persists. However, to make sure nothing can interfere with the installation, we recommend you perform a clean boot which will disable all non-Microsoft programs and services from starting up. This way, you can easily deduct just which program causes this error to happen!
- Use the Windows + R key combination on your keyboard. In the Run dialog box type MSCONFIG and click OK.
- Click on the Boot tab and uncheck the Safe Boot option (if checked).

- Under the General tab in the same window, click to select the Selective startup option, and then click to clear the Load startup items check box to make sure it’s not checked.
- Under the Services tab, click to select the Hide all Microsoft services check box, and then click Disable all.

- On the Startup tab, click Open Task Manager. In the Task Manager window under the Startup tab, right click on each startup item which is enabled and select Disable.

- After this, you will need to perform some of the most boring processes and that is enabling the Startup items one by one and restarting your computer. After that, you need to check whether the problem appears again. You will need to repeat the same process even for the Services which you have disabled in Step 4.
- Once you locate the problematic startup item or service, you can undertake action in order to solve the problem. If it is a program, you can reinstall it or repair If it is a service, you can disable it, etc.
Solution 8: Use SFC to Scan for Memory Leaks
It has been reported that the Microsoft .NET Framework corruption is related to faulty system files. These problems are rooted deep inside the system files and the only way to try to resolve them is by running the System File Checker (SFC). It will scan your system files for errors and possible repair or replace them. Follow the steps below in order to do so!
- Search for “Command Prompt” by typing it either right in the Start menu or by pressing the search button right next to it. Right-click the first entry which will pop up as a search result and select the “Run as administrator” context menu entry.
- Additionally, you can also use the Windows Logo Key + R key combination in order to bring up the Run dialog box. Type in “cmd” in the dialog box which appears and use the Ctrl + Shift + Enter key combination for admin Command Prompt.

- Type in the following commands in the window and make sure you press Enter after typing each one. Wait for the “Operation completed successfully” message or something similar to know that the method worked.
sfc /scannow
- Try to restart your computer and check to see if the Unhandled Exception has Occurred in your Application error continues to appear on your computer.
Solution 9: Performing a Clean Install
If none of the methods presented below have managed to help you in resolving the issue, it’s very likely that you’re dealing with some kind of Windows inconsistency that cannot be resolved conventionally.
If this scenario is applicable, you should be able to fix the issue by resetting every component associated with your Windows installation. If you want to go this route, you have two ways forward. It all boils down to the procedure that you want to follow:
- Repair install (in-place repair) – This procedure is the best approach when you need to refresh every OS component, but some users might end up considering it a little too tedious for their taste. Keep in mind that you will need a compatible installation media in order to enforce this fix, but the major advantage is that all your personal data (including games, applications and personal media) will be preserved even if you don’t back up your computer.
- Clean install – If you’re looking for the simplest solution, this is the way to go. You will not need an installation media to enforce it (it’s all done through the Windows GUI). But unless you back up your data in advance, be prepared for total data loss.