The Witcher 3: Wild Hunt ir darbības lomu spēle, kuru izdevis un izstrādājis CD Projekt. Šī ir nepārtraukta spēļu sērija, kas digitālajā pasaulē ir atstājusi diezgan lielu nospiedumu.

Neskatoties uz spēles popularitāti, mēs saskārāmies ar konkrētu jautājumu, kur spēle vai kinematogrāfijas laikā spēle avarēja. Pēc spēles avārijas nebija nekāda veida kļūdu ziņojumu, un lietotājs tika novirzīts atpakaļ uz darbvirsmu. Tas kļūst nomākti, jo kļūdas ziņojuma vispār nav, un problēmas cēlonis nav arī noteikts.
Šajā rakstā mēs izskatīsim visus cēloņus, kāpēc rodas šī problēma, un problēmas risināšanas risinājumus.
Kas izraisa Witcher 3 avāriju?
Pēc visu lietotāju pārskatu analīzes un eksperimentēšanas datorā secinājām, ka problēma radusies vairāku dažādu iemeslu dēļ, sākot no programmatūras problēmām līdz aparatūras problēmām. Daži no iemesliem, kāpēc jūs varat saskarties ar šo problēmu, ir:
- Videokartes / aparatūras pārkaršana: iespējams, tas ir viens no populārākajiem iemesliem, ar kuru mēs saskārāmies. Ja jūsu videokarte vai kāda cita aparatūra pārkarst, dators, lai novērstu problēmu, spēli avarē.
- Bojāta / nepilnīga instalēšana: ja instalācija ir kaut kā bojāta vai tajā trūkst failu, var rasties pēkšņa avārija. Spēļu failu pārbaude var palīdzēt un novērst problēmu.
- NVIDIA straumēšanas pakalpojums: kaut arī grafikas giganta piedāvātais straumēšanas pakalpojums ir viens no sava veida rīkiem, ir zināms, ka tas rada konfliktus ar spēli, pat ja jūs to neizmantojat, un izraisa tās avāriju.
- Modifikācijas: Modifikācijas padara spēli vēl jautrāku Witcher 3, bet tāpat kā visi katra modifikācijas trūkumi, tas nav izņēmums. Ja mod kādā brīdī ir pretrunā ar jūsu spēli, tas avarēs.
- Steam Cloud Saves: Steam Cloud Saves ir funkcija, ko piedāvā Steam, lai saglabātu jūsu spēli, atrodoties ceļā. Šis pakalpojums periodiski saglabā jūsu failu; ir zināms, ka tieši šī darbība izraisa konfliktus ar Witcher 3 un izraisa tā avāriju.
- Overclocking: Overclocking ir “rīks”, lai palielinātu jūsu sulas daudzumu no datora. Tomēr ir zināms, ka tas padara sistēmu nestabilu un izraisa tās avāriju bez redzama iemesla. Atspējojot darbību, parasti problēma tiek atrisināta.
- Bojāti grafikas karšu draiveri: grafiskā karte ir galvenais dzinējspēks, spēlējot spēli datorā. Ja tā draiveri nekādā veidā nav sinhronizēti ar aparatūru, starp jūsu spēli var avarēt.
- Pārklājums GOG Galaxy: GOG Galaxy ir spēļu kolekcijas platforma tāpat kā Steam, un ir zināms, ka tā pārklājums rada problēmas ar Witcher 3. Pārklājuma atspējošana šeit darbojas.
- GPU savienotāji: GPU ir savienots ar jūsu galveno mātesplatē, izmantojot dažādus savienotājus. Ja šie savienotāji ir vaļīgi, tie, iespējams, nepārsūta informāciju pareizi un tādējādi rada problēmas spēles darbībā.
- Augsti grafikas iestatījumi: ja jums ir ļoti augsti grafikas iestatījumi, bet jums nav atbilstoša datora, lai tos varētu apstrādāt, rodas vairākas problēmas, un spēle var sasalt / avarēt.
Pirms sākam risinājumus, pārliecinieties, vai esat pieteicies kā administrators, kā arī iepriekš saglabājiet savu darbu, jo mēs bieži restartēsim jūsu datoru.
Priekšnosacījums: Sistēmas prasības
Pirms sākam risinājumus, vispirms jāpārbauda, vai jūsu dators pat atbilst spēles sistēmas prasībām.
Wild Hunt minimālās sistēmas prasības
Procesors : Intel CPU Core i5-2500K 3.3GHz / AMD CPU Phenom II X4 940 RAM : 6 GB OS : 64 bitu Windows 7 vai 64 bitu Windows 8 (8.1) VIDEO KARTE : Nvidia GPU GeForce GTX 660 / AMD GPU Radeon HD 7870 PIXEL SHADER : 5,0 VERTEX SHADER : 5,0 BEZMAKSAS Diska vieta : 40 GB VĒLOTĀ VIDEO RAM : 1,5 GB
Savvaļas medību ieteiktās prasības
Procesors : Intel CPU Core i7 3770 3.4 GHz / AMD CPU AMD FX-8350 4 GHz RAM : 8 GB OS : 64 bitu Windows 7 vai 64 bitu Windows 8 (8.1) VIDEO KARTE : Nvidia GPU GeForce GTX 770 / AMD GPU Radeon R9 290 PIXEL SHADER : 5.0 VERTEX SHADER : 5.0 BEZMAKSAS Diska vieta : 40 GB VĒLOTA VIDEO RAM : 2 GB
Jāatzīmē, ka, lai spēle būtu nevainojama, jums vajadzētu būt vismaz ieteicamajām sistēmas prasībām.
1. risinājums: Spēļu failu integritātes pārbaude
Pirms izmēģināt tehniskās problēmu novēršanas metodes, vispirms pārbaudīsim, vai jums ir derīga spēles instalācija. Mēs saskārāmies ar vairākiem gadījumiem, kad spēles faili bija vai nu bojāti, vai arī to instalēšana bija nepilnīga. Lietotājiem šī problēma var rasties, ja tiek pārtraukts atjaunināšanas process vai spēles faili tiek pārvietoti starp mapēm.
Šajā risinājumā mēs atvērsim Steam un izmantosim iebūvēto funkciju, lai pārbaudītu spēles failu integritāti. Ja lietojumprogramma kaut ko atrod, tā tiks aizstāta.
Piezīme: Ja spēles spēlēšanai izmantojat citu izdevējdarbības programmatūru, tajā jāveic arī līdzīgas darbības.
- Atveriet savu Steam lietojumprogrammu un augšējā joslā noklikšķiniet uz Spēles . Tagad kreisajā kolonnā atlasiet Witcher 3 , ar peles labo pogu noklikšķiniet uz tā un atlasiet Rekvizīti .
- Kad esat rekvizītos, noklikšķiniet uz vietējo failu kategorijas un atlasiet Pārbaudīt spēles failu integritāti .

- Pagaidiet, līdz process ir pabeigts. Pēc verifikācijas pabeigšanas restartējiet datoru un vēlreiz palaidiet Witcher 3. Pārbaudiet, vai avārijas problēma ir atrisināta.
2. risinājums: spēles prioritātes maiņa
The priority of a process or applications tells the computer the importance and whether it should be given precedence over others when allocating resources. Be default, the priority of all applications is normal except system processes. If Witcher 3 isn’t getting enough resources, it will crash indefinitely. In this solution, we will navigate to the task manager, search for The Witcher 3 process and then change the priority to High Priority and see if this works for us.
- Launch Witcher 3on your computer. To go to the Desktop while the game is still running, press Windows + D. Press Windows + R, type “taskmgr” in the dialogue box and press Enter.
- Tagad noklikšķiniet uz cilnes Sīkāka informācija , atrodiet visus Mordhau ierakstus un Tā kā Witcher 3 galvenais palaidējs ir pats Steam, jums jāmaina arī tā prioritāte.
- Ar peles labo pogu noklikšķiniet uz katra ieraksta, virziet kursoru virs iestatītās prioritātes un iestatiet to uz Above Normal vai High .
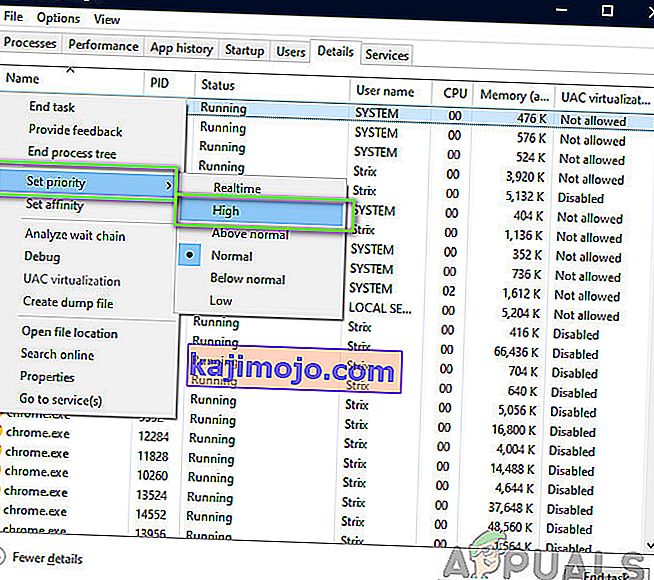
- Dariet to visiem ierakstiem. Tagad Alt-tab savā spēlē un sāc spēlēt. Ievērojiet, vai tas kaut ko ietekmēja avārijas problēmu.

3. risinājums: NVIDIA straumētāja pakalpojuma atspējošana
NVIDIA Streamer pakalpojums ir komplektā ar jaunākajām grafikas kartēm, ko izdevusi NVIDIA. Tas visu laiku darbojas kā fona pakalpojums jūsu datorā un tiek parādīts, kad straumējat, izmantojot NVIDIA lietojumprogrammu. Mēs redzējām, ka šis pakalpojums daudz konfliktēja ar Wither 3 un izraisīja vairākus jautājumus, tostarp avāriju. Šajā risinājumā mēs virzīsimies uz jūsu pakalpojumiem un atspējosim pakalpojumu manuāli.
- Nospiediet Windows + R, dialoglodziņā ierakstiet “services.msc” un nospiediet taustiņu Enter.
- Kad esat pakalpojumā Pakalpojumi, meklējiet NVIDIA Streamer Service ierakstu . Kad esat to atradis, ar peles labo pogu noklikšķiniet uz tā un atlasiet Rekvizīti .
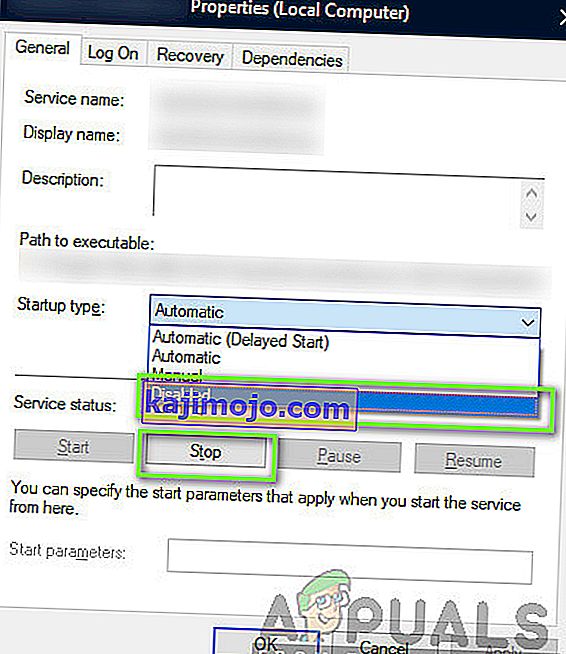
- Kad esat rekvizītos, noklikšķiniet uz Apturēt, lai apturētu pakalpojumu un izvēlētos startēšanas veidu kā Manuāls . Saglabājiet izmaiņas un izejiet.
- Now try launching Witcher 3 and see if the crashing issue is resolved.

Solution 4: Disabling Steam Cloud Saves
The Steam Cloud is a platform which allows games and users to save their progress and data over the Steam cloud so whenever a user logs into the client, the client automatically downloads and updates the progress and preferences. This is a pretty nifty feature which makes Steam more preferable to other engines but is also known to cause several issues.
In this solution, we will navigate to the Steam settings and turn the synchronization off.
- Launch Steam as an administrator and click on Library present at the top.
- Now, all the games will be located at your left-side panel. Locate Witcher 3, right-click on it and select Properties.
- Once in properties, click on the Updates tab and uncheck the option of Enable Steam Cloud Synchronization.

- Save changes and exit. Restart Steam and launch the game. Check if the issue still occurs.

Solution 5: Disabling VSync
Vsync (Vertical Sync) allows users to synchronize the frame rate of the game with the monitor refresh rate for better stability. This feature is embedded in Witcher 3 and is usually enabled by default. Even though this mechanism is quite nifty, it is known to cause issues with the gameplay and induce crashing.
In this solution, we will navigate to the settings of the game and disable the option.
- Launch Witcher 3 and click on Options from the main menu.
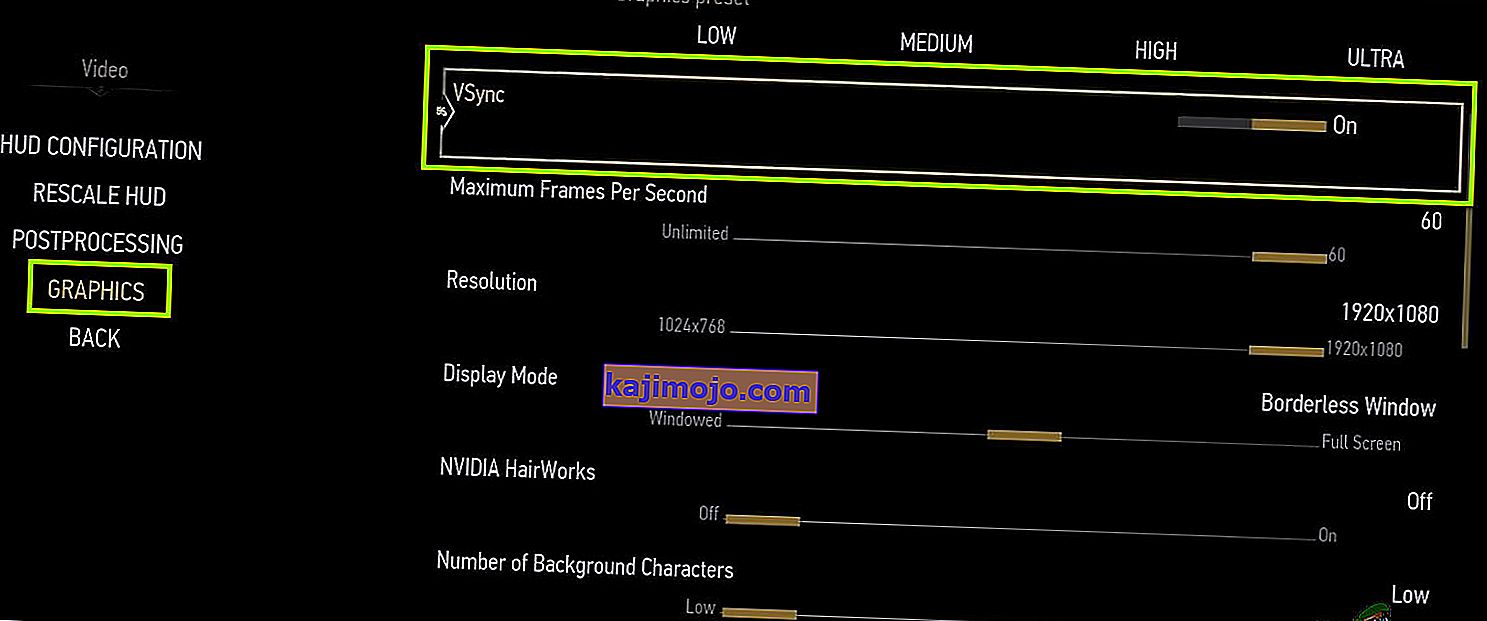
- Now, click on Video and then select Graphics.
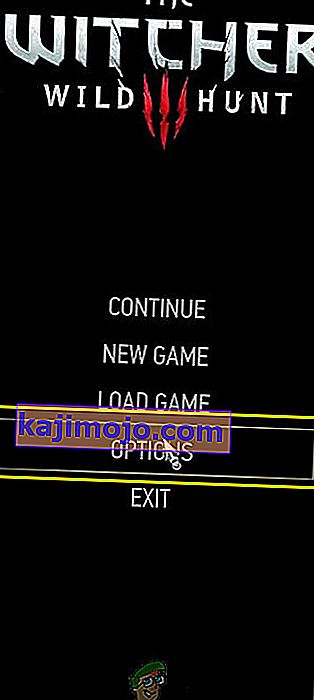
- Once in Graphics options, click on VSync and turn the option off.


Note: You can also tweak other graphics settings from here if this doesn’t work.
- Save changes and exit. Restart Witcher 3 and see if the issue is resolved.
Solution 6: Disabling Frame Rate Cap
Witcher 3 also provides an in-game option which allows you to set the maximum frame rate. However, even though this allows you to manage your frame rate, it causes issues with the game. In this solution, we will navigate to graphics settings and remove the cap.
- Navigate to Graphics settings using Options in the main menu as we did in the last solution.
- Once in graphics, look for the option of Maximum Frames Per Second. Move the slider to unlimited.

- Restart the game and check if the issue is resolved for good.

Solution 7: Playing in Full Screen
Another thing to try before we jump into more technical methods is changing the game type to Fullscreen. It seems that the borderless window causes more load on the CPU as the Desktop is also running in the background. In this solution, we will navigate to Witcher 3 settings and tweak the changes.
- Navigate to Graphics Settings using Options from the main menu as we did earlier.
- Now, click on Display Mode and set the option to Fullscreen.
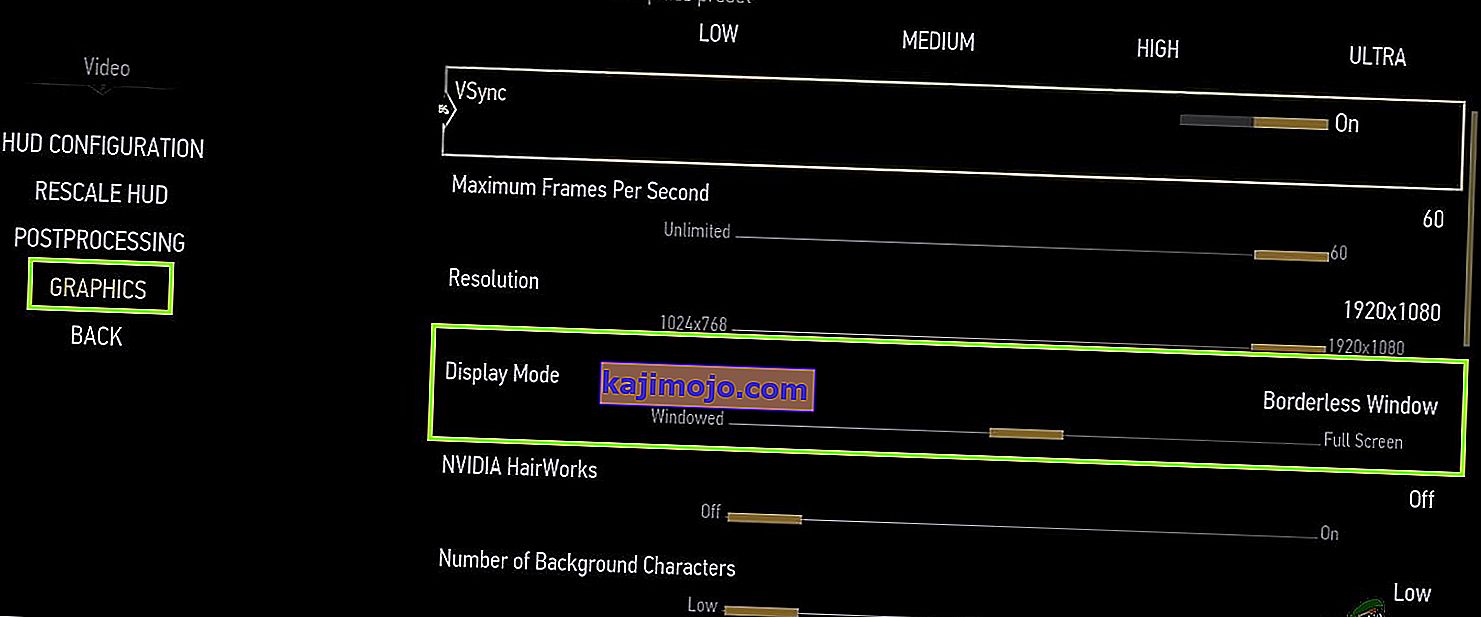
- Save changes and exit. Restart the game and check if the crashing issue is resolved.

Solution 8: Disabling Overclocking
All high-end PC builds nowadays have the option of Overclocking which can help in outputting more juice than what your specifications already have. Overclocking means running the graphics card/processor faster than its default clock speed. When this occurs, the hardware reaches its threshold temperature in a while. The computer detects this and reverts to the normal clock speed until the hardware cools off. When the hardware is cool enough again, the clock speed is increased again.

This act increases your computer’s performance a lot and helps if you don’t have a powerful computer with good processing/graphics capability. The thing to note here is that not all games support overclocking in their mechanisms. The same is the case with Witcher 3. Hence you should try disabling all overclocking on your computer and then try launching the game. If things go well, you will not experience the crashing anymore.
Solution 9: Disabling Mods
Mods are third-party plugins which are meant to enhance the experience of users by changing the graphics a little bit and adding more features than the stock game. This gives players a whole new level of customization to create a better and enjoyable gaming environment. However, since Mods are third-party, they are known to conflict with the game’s very engine and cause several issues.

Also, if the mod’s version and the game’s version are not in sync with each other, the game will crash whenever the mods try to change something in the game. Hence, in this solution, you should try disabling all types of mods on your computer and then see if the issue gets solved. Consider copy-pasting the mod content to another location until we complete the troubleshooting process. After removing the mods, restart your computer and check if the issue is resolved.
Solution 10: Checking for Overheating
Computers often get overheated when they used extensively or when they are performing heavy computations. Similar cases were seen to occur with Witcher 3. It seemed that whenever the computer overheated, the users were given no warning of any such and the game automatically crashed.

Here, you should check your components whether the cooling system is indeed working properly and dust isn’t blocking anything. You can also download temperature checking utilities and measure the temperature when the game is running. Make sure that no components (especially the graphics card) are overheating.
Solution 11: Checking Connectors:
Another thing to try is making sure that the connectors connecting the graphics card, RAM, etc. are properly connected with the hardware. This was a very common occurrence with various users. If the connection is not stable, the data will not be transmitted properly and hence, your game might crash.

You can even try placing the hardware on other connectors and see if this fixes the problem at hand. Press the hardware gently into the connectors to make sure.
Solution 12: Updating Graphics Drivers
If all the above methods don’t work, there is a possibility that you don’t have correct graphics drivers installed on your computer. Drivers are the main components which facilitate the interaction between the game and the hardware. If the drivers are outdated or corrupt, the game might not display correctly and cause lagging. In this solution, we will first remove the current drivers using DDU and then install fresh copies.
- Download and install DDU (Display driver uninstaller) from its official website.
- After installing Display Driver Uninstaller (DDU), launch your computer in safe mode. You can check our article on how to boot your computer into safe mode.
- After launching the DDU, select the first option “Clean and restart”. This will uninstall the current drivers completely from your computer.

- Now after the uninstallation, boot your computer normally without safe mode. Press Windows + R, type “devmgmt.msc” in the dialogue box and press Enter. Right-click on any space and select “Search for hardware changes”. The default drivers will be installed. Try launching the game and check if this solves the problem.
- In the majority of the cases, the default drivers will not work for you so you can either install the latest drivers through Windows update or navigate to your manufacturer’s website and download the latest ones.

- After you have installed the drivers, restart your computer and check if the problem is solved.
Note: Also consider uninstalling NVIDIA GeForce Experience from your computer. This is known to cause issues. Also, we saw several cases where rolling back the driver fixes the problem. Make sure that you try it.