TeamViewer ir noderīga programma video tērzēšanai un tālvadībai, un tā ir diezgan populāra izvēle starp spēlētājiem un attālo IT palīdzību. Tomēr daudzi lietotāji ir ziņojuši, ka viņi vienkārši nespēj izveidot savienojumu. Viņi ekrāna apakšdaļā blakus sarkanajai gaismai redz problemātisko kļūdas ziņojumu.

Problēmas risināšanai varat izmantot diezgan daudzas metodes, un mēs iesakām tās pārbaudīt tālāk. Parasti tās ir diezgan viegli izpildāmas, un tās var ātri atrisināt jūsu problēmu!
Kas izraisa TeamViewer kļūdu “Nav gatava pārbaudīt savienojumu” sistēmā Windows?
Šai konkrētajai problēmai ir daudz dažādu iemeslu, un pareizā noteikšana var būt izšķiroša, ja nevēlaties izmēģināt katru sarakstā iekļauto metodi. Tas palīdzēs jums ātrāk atrast risinājumu, un tāpēc mēs nolēmām izveidot visu iespējamo cēloņu sarakstu, kas atrodas zemāk!
- Nepareizi iestatījumi failā “hosts” - failā “hosts” ir svarīga informācija par lietotnēm, kas izveido savienojumu ar internetu, un iespējams, ka TeamViewer ieraksts ir bojāts. Dzēšot tā ierakstu, Windows to atkārtoti izveidos, tāpēc mēģiniet to atrisināt.
- Antivīrusu vai ugunsmūra problēmas - ja jūsu palaistais ugunsmūris vai antivīruss kavē TeamViewer piekļuvi internetam, pārliecinieties, ka mēģināt izdarīt izņēmumu tā galvenajam izpildāmajam failam.
- DNS un Winsock problēmas - var mainīt DNS adreses un atiestatīt Winsock. Daudziem lietotājiem tas ir viss, kas nepieciešams problēmas risināšanai, tāpēc noteikti izmēģiniet to!
- IPv6 savienojamība - TeamViewer vienkārši nedarbosies ar IPv6 dažreiz, tāpēc pārliecinieties, ka apsverat iespēju to atspējot, lai atrisinātu šo problēmu. Tas nesāpēs, un tas var atgriezt TeamViewer!
- TeamViewer jaunā saskarne - lietotāja saskarne nav saistīta ar savienojamības problēmām, bet tas noteikti attiecās uz vairākiem TeamViewer lietotājiem. Atgriežoties pie vecās saskarnes, viņiem izdevās atrisināt problēmu.
1. risinājums: noņemiet TeamViewer no Hosts faila
Ļoti iespējams, ka TeamViewer ieraksts datora failā “hosts” ir bojāts. Tajā var tikt rādītas adreses un dati, kas ir pilnīgi nepareizi, un mēs iesakām izdzēst tā ierakstu. Pēc atkārtotas atvēršanas ieraksts tiks atjaunots, un, cerams, problēma vairs neradīsies!
- Pārejiet uz vietu C >> Windows >> System32 >> Draiveri >> Utt , pārejot uz to pēc File Explorer atvēršanas. Pirmkārt, noklikšķiniet uz šajā datorā vai manā datorā no kreisās puses panelī, lai atrastu un atvērtu savu Local Disk C .
- Ja jūs nevarat redzēt Windows mapi, jums, iespējams, būs jāieslēdz opcija, kas ļauj jums redzēt slēptos failus un mapes. Noklikšķiniet uz cilnes “ Skatīt ” File Explorer augšējā izvēlnē un noklikšķiniet uz izvēles rūtiņas “ Slēptās vienības ”, kas Rādīt / paslēpt failu pārlūku parādīs paslēptos failus un atcerēsies šo iestatījumu, līdz atkal to mainīsit.

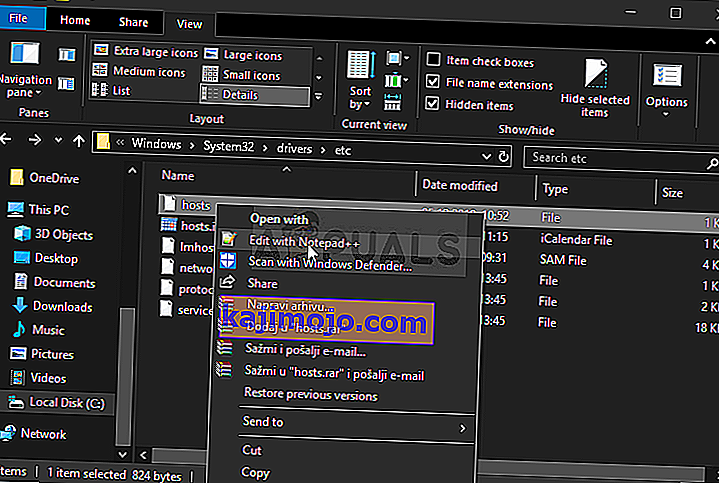
- Mapē Etc atrodiet resursdatora failu, ar peles labo pogu noklikšķiniet uz tā un izvēlieties Atvērt ar Notepad . Izmantojiet taustiņu kombināciju Ctrl + F un pārliecinieties, vai lodziņā Atrast ko ievadāt “teamviewer”, pirms noklikšķināt uz Atrast nākamo
- Failā atrodiet sadaļu TeamViewer. Tam vajadzētu sākt ar “#Teamviewer” un pārliecinieties, ka esat atlasījis visu, kas tam pieder, ar peles labo pogu noklikšķiniet uz atlases un konteksta izvēlnē izvēlieties pogu Dzēst.
- Uzklikšķiniet File >> Saglabāt , lai saglabātu izmaiņas vai izmantot Ctrl + S taustiņu kombināciju . Aizveriet Notepad un restartējiet datoru. Pārbaudiet, vai problēma joprojām pastāv saistībā ar TeamViewer “Nav gatavs. Pārbaudiet savienojumu ”kļūdas ziņojums!
2. risinājums: mainiet savu DNS adresi
Lietotāji ir teikuši, ka viņi spēja atrisināt problēmu, vienkārši mainot jūsu ISP (interneta pakalpojumu sniedzēja) nodrošināto DNS un sākot izmantot citu. Tas var būt tā datora DNS, kurā problēma neparādās, taču daudzi lietotāji problēmas risināšanai vienkārši izmantoja Google DNS. Veiciet tālāk norādītās darbības, lai mainītu DNS adresi datorā.
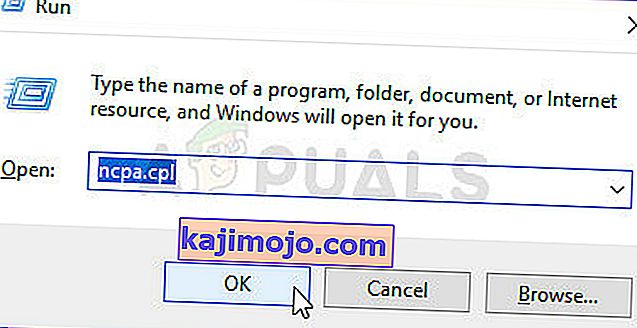
- Izmantojiet Windows + R taustiņu kombināciju, kurai vajadzētu atvērt utilītu Palaist, kur tekstlodziņā ierakstiet “ ncpa.cpl ” un noklikšķiniet uz Labi, lai vadības panelī atvērtu interneta savienojuma iestatījumu ierakstu .
- To pašu var izdarīt, vienkārši manuāli atverot vadības paneli . Pārslēdziet opciju Skatīt pēc loga augšējā labajā stūrī uz Kategorija un augšpusē noklikšķiniet uz Tīkls un internets . Noklikšķiniet uz Tīkla un koplietošanas centra pogas, lai to atvērtu, pirms kreisajā izvēlnē atrodat pogu Mainīt adaptera iestatījumus un noklikšķiniet uz tā.
- Tagad, kad interneta savienojuma ekrāns ir atvērts, izmantojot jebkuru no iepriekš minētajām metodēm, veiciet dubultklikšķi uz aktīvā tīkla adaptera (tā, kuru izmantojat, lai izveidotu savienojumu ar internetu) un noklikšķiniet uz zemāk esošās pogas Rekvizīti , ja jums ir pašreizējā lietotāja konta administratora atļaujas.
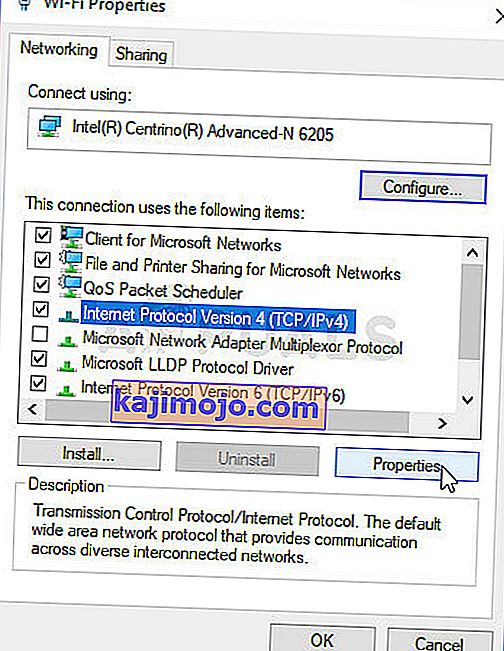
- Sarakstā atrodiet vienumu Interneta protokola versija 4 (TCP / IPv4) . Noklikšķiniet uz tā, lai to atlasītu, un noklikšķiniet uz pogas Rekvizīti zemāk.
- Palieciet cilnē Vispārīgi un logā Rekvizīti mainiet radiopogu uz “ Izmantot šīs DNS servera adreses ”, ja tā bija iestatīta uz citu opciju.
- Jebkurā gadījumā iestatiet vēlamo DNS serveri kā 8.8.8.8 un alternatīvā DNS serveri - 8.8.4.4.
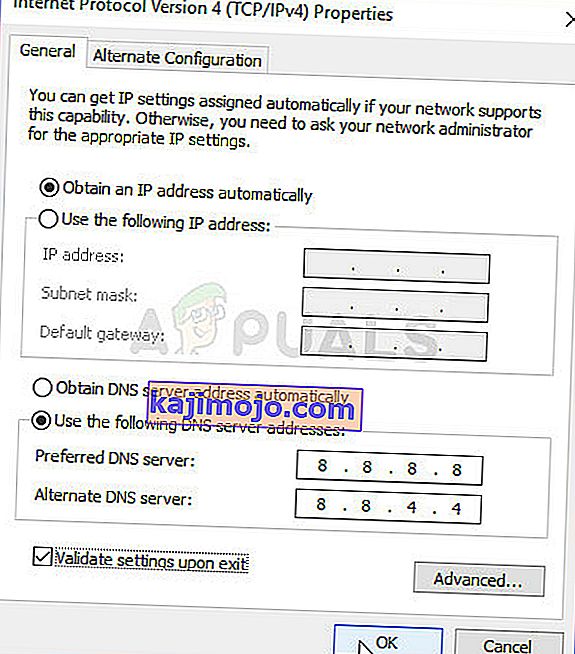
- Saglabājiet izvēles rūtiņu “ Apstiprināt iestatījumus pēc iziešanas ” un noklikšķiniet uz Labi, lai izmaiņas tiktu piemērotas nekavējoties. Pārbaudiet, vai TeamViewer “Nav gatavs. Pārbaudiet savienojumu ”datorā joprojām parādās kļūdas ziņojums!


3. risinājums: atiestatiet Winsock
“ Netsh Winsock reset ” ir noderīga komanda, kuru varat izmantot komandu uzvednē, lai atiestatītu Winsock Catalog atpakaļ uz noklusējuma iestatījumu vai tā tīru stāvokli. Varat izmēģināt šo metodi, ja neizdodas izveidot savienojumu TeamViewer.
- Meklējiet “ Komandu uzvedne ”, ierakstot to tieši izvēlnē Sākt vai nospiežot meklēšanas pogu blakus tai. Ar peles labo pogu noklikšķiniet uz pirmā ieraksta, kas parādīsies kā meklēšanas rezultāts, un atlasiet konteksta izvēlnes ierakstu “ Run as administrator ”.
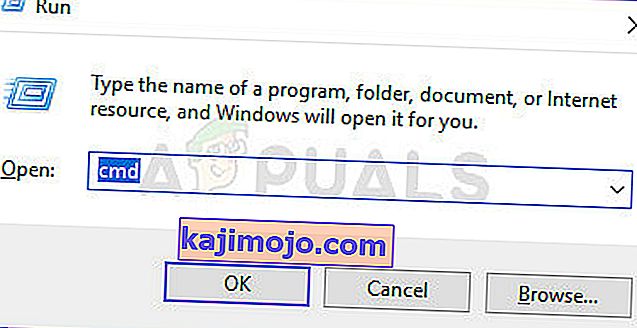
- Additionally, you can also use the Windows Logo Key + R key combination to bring up the Run dialog box. Type in “cmd” in the dialog box which appears and use the Ctrl + Shift + Enter key combination to run Command Prompt using administrator privileges.
- Type in the following commands in the window and make sure you press Enter after typing each one. Wait for the “Winsock reset completed successfully” message or something similar to know that the method has worked and you haven’t made any mistakes while typing. Check to see if the issue persists.

netsh winsock reset netsh int ip reset

Solution 4: Don’t Use the New User Interface
User interface shouldn’t be in any way connected to TeamViewer’s internet connection but, weirdly enough, many users have reported that they were able to resolve this issue simply by reverting to the program’s old design. This can be done in TeamViewer’s settings so make sure you follow the steps below and try to resolve this connectivity issue.
- Open TeamViewer by double-clicking its icon from Desktop or by searching for it after opening the Start menu and left-clicking the top result.
- From the home screen, click the Extras button from the menu bar and choose the Options entry from the list which will appear.
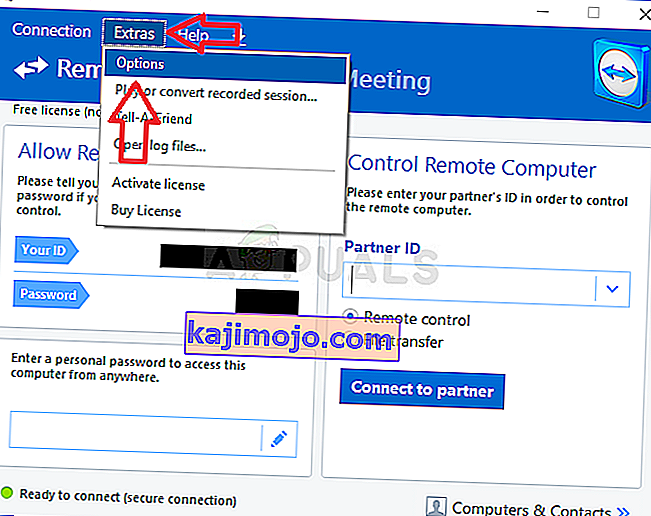
- Navigate to the Advanced tab in TeamViewer options from the left-side navigation menu and check under General Advanced Settings for the “Use new user interface” option. Make sure you uncheck the box next to it before confirming the changes you have made.

- Reopen TeamViewer and check to see if the TeamViewer “Not ready. Check your connection” error message still appears on your computer!


Solution 5: Add an Exception for the Teamviewer_Service.exe File
Sometimes antivirus tools fail to recognize the program’s efforts to connect to the Internet as harmless and TeamViewer’s features are often blocked by it. To prove to the antivirus that the program is harmless, you will have to add it to its Exceptions/Exclusions list!
- Open the antivirus user interface by double-clicking on its icon at the system tray (right part of the taskbar at the bottom of the window) or by searching for it in the Start menu.
- The Exceptions or Exclusions setting is located in different spots concerning different antivirus tools. It can often be found simply without much hassle but here are some quick guides on how to find it in the most popular antivirus tools:
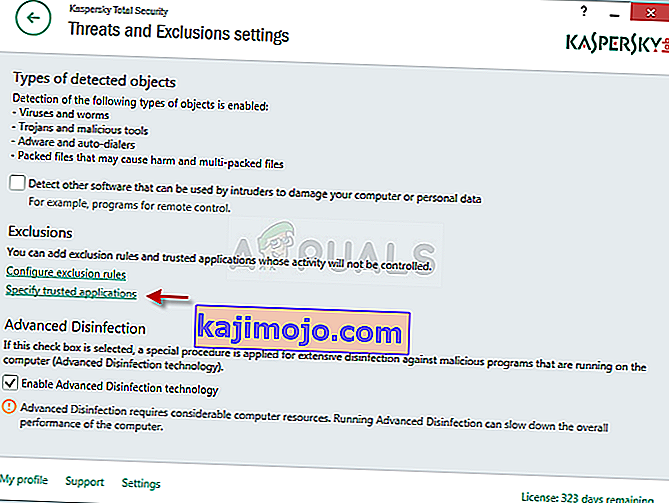
Kaspersky Internet Security: Home >> Settings >> Additional >> Threats and Exclusions >> Exclusions >> Specify Trusted Applications >> Add.
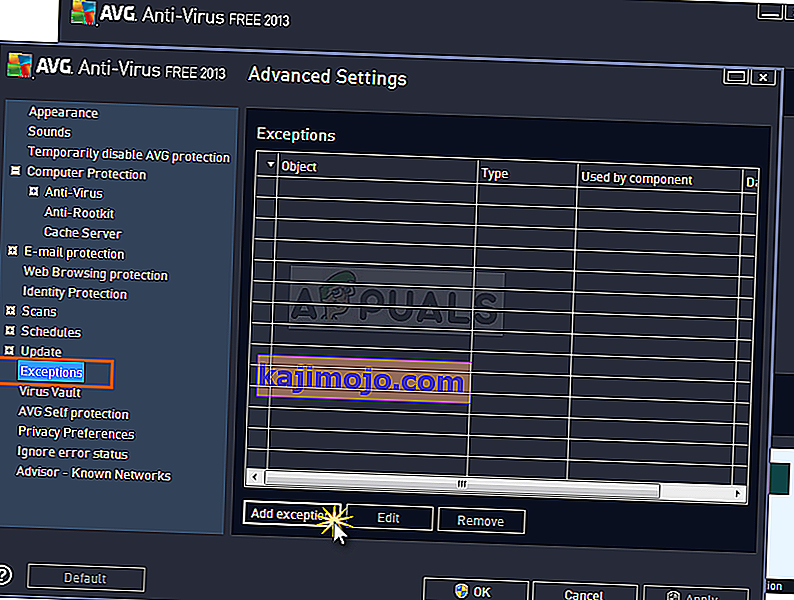
AVG: Home >> Settings >> Components >> Web Shield >> Exceptions.
Avast : Home >> Settings >> General >> Exclusions
- You will need to add the Teamviewer_Service.exe executable in the box which will appear prompting you to navigate to the folder. It should be in the same folder where you decided to install TeamViewer in. By default, it’s:
C:\Program Files (x86)\TeamViewer
- Check to see if you are now able to use TeamViewer without receiving the problematic error message. If it still won’t work, try restarting your computer and try again. The last step would be to uninstall the antivirus and try a different one if the problem persists.


Solution 6: Allow it in Windows Defender Firewall
For TeamViewer’s features to work properly, the app needs to have uninterrupted access to the Internet and its servers to work properly. Windows Defender Firewall is often to blame in such cases and we recommend you make an exception for the Teamviewer_Service.exe executable inside the Windows Defender Firewall!
- Open up Control Panel by searching for the utility in the Start button or by clicking the Search button or the Cortana button at the left part of your taskbar (bottom left part of your screen).
- After Control Panel opens, change the view to Large or Small icons and navigate to the bottom to open the Windows Defender Firewall option.
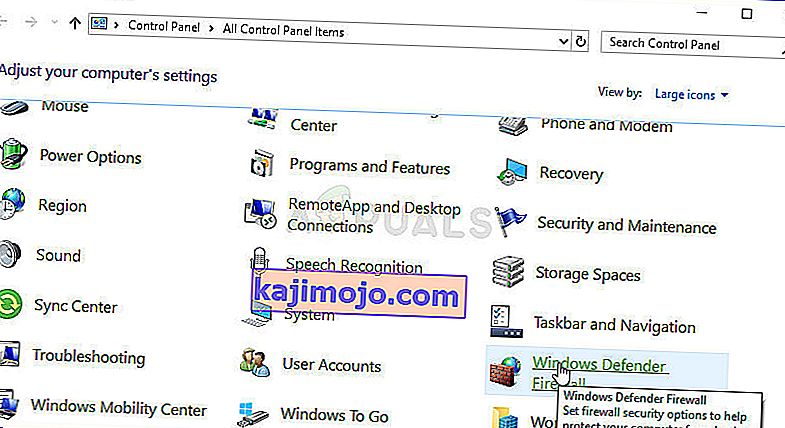
- Click on Windows Defender Firewall and click on the Allow an app or feature through Windows Firewall option from the left side list of options. A list of installed apps should open. Click the Change settings button at the top of the screen and provide administrator permissions. Try locating the executable inside. If it’s not there, click the Allow another app button below.

- Navigate to where you installed TeamViewer (C:\Program Files (x86)\TeamViewer by default) and choose the Teamviewer_Service.exe file.
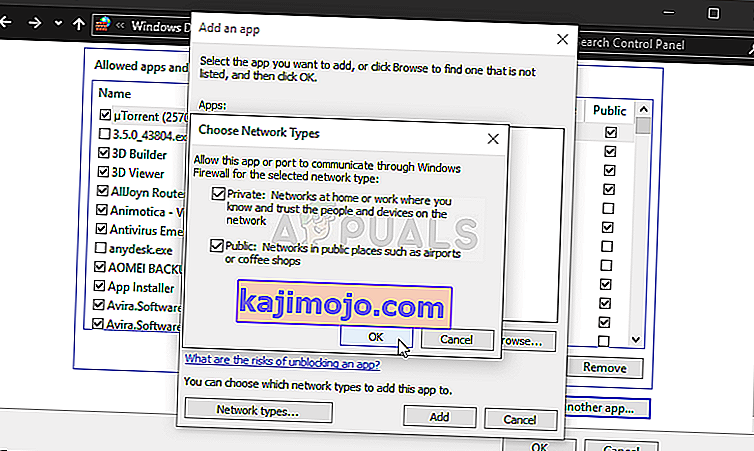
- After locating it, click the Network types button at the top and make sure you check the boxes next to both Private and Public entries before clicking OK >> Add.
- Click OK and restart your computer before checking whether the TeamViewer “Not ready. Check your connection” error message still appears on your computer.


Solution 7: Disable IPv6
Disabling Internet Protocol version 6 connectivity on your computer managed to resolve the problem for many users and it’s an easy way to resolve the problem. This makes this method worthy and you shouldn’t skip it during your troubleshooting process.
- Use the Windows + R key combo which should immediately open the Run dialog box where you should type ‘ncpa.cpl’ in the bar and click OK to open the Internet Connection settings item in Control Panel.
- The same process can also be done by manually opening the Control Panel. Switch the View by setting at the top right section of the window to Category and click on Network and Internet at the top. Click the Network and Sharing center button to open it. Try to locate the Change adapter settings button at the left menu and click on it.
- When the Internet Connection window opens, double-click on your active Network Adapter.
- Then click Properties and locate the Internet Protocol Version 6 entry on the list. Disable the checkbox next to this entry and click OK. Restart your computer to confirm the changes and check to see if the problem persists.


Solution 8: Restart the TeamViewer Service
Stopping the TeamViewer service from running will effectively restart the whole process and many users have reported that it only took them a few minutes to get TeamViewer to work again. Before starting, make sure you have closed TeamViewer completely.
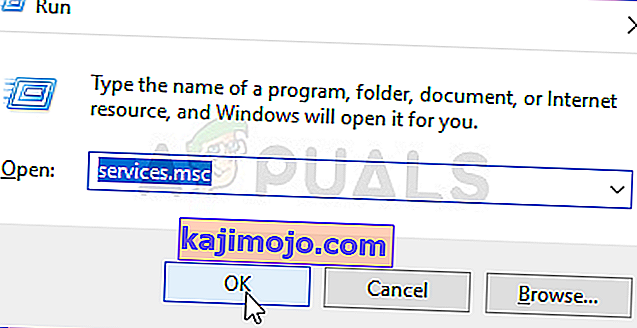
- Open the Run utility by using the Windows Key + R key combination on your keyboard (press these keys at the same time. Type “services.msc” in the newly opened box without the quotation marks and click OK to open the Services tool.
- The alternative way is to open the Control Panel by locating it in the Start menu. You can also search for it using the Start menu’s search button.
- After the Control Panel window opens, change the “View by” option at the top right part of the window to “Large Icons” and scroll down until you locate the Administrative Tools entry. Click on it and locate the Services shortcut at the bottom. Click on it to open it as well.
- Locate the TeamViewer Service on the list, right-click on it and select Properties from the context menu which appears.
- If the service is started (you can check that just next to the Service status message), you should stop it for now by clicking the Stop button in the middle of the window. If it is stopped, leave it stopped until we proceed.
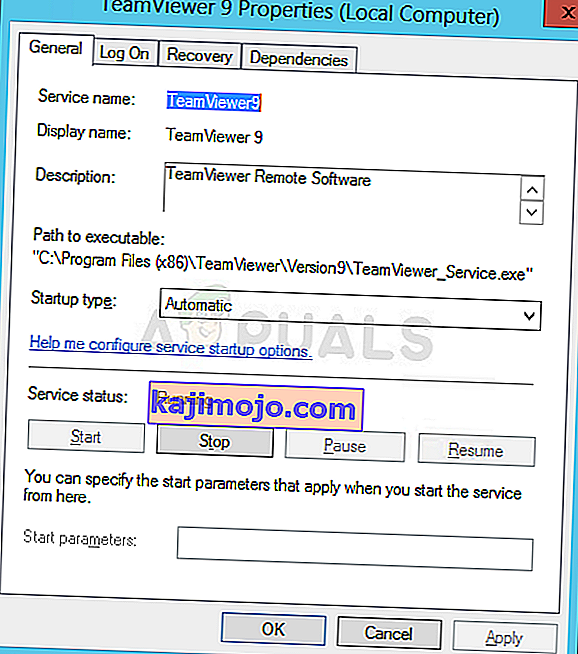
- Make sure that the option under the Startup type menu in the service’s properties window is set to Automatic before you proceed with other steps. Confirm any dialogue boxes which may appear when changing the startup type. Click on the Start button in the middle of the window before exiting.


Solution 9: Reinstall TeamViewer
If all methods above fail to work, reinstalling TeamViewer is the last method which can help you resolve the problem on your computer. It should be fast and painless if you follow all the steps properly! You will also install the latest version which contains the patch to the specific issue you are having!
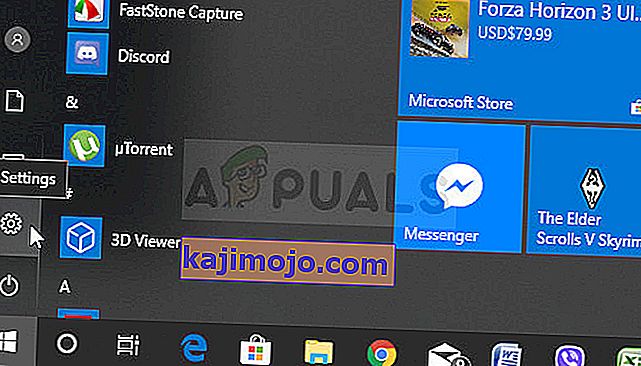
- Click the Start menu and open Control Panel by searching for it simply by typing with the Start menu window open. Alternatively, you can click the cog icon in the lower-left part of the Start menu to open the Settings app if you are using Windows 10.
- In Control Panel, select the View as: Category option at the top right corner of the Control Panel window and click on Uninstall a Program under the Programs section.
- If you are using the Settings app, clicking on Apps should immediately open a list of all installed programs on your PC so wait for a while for it to load
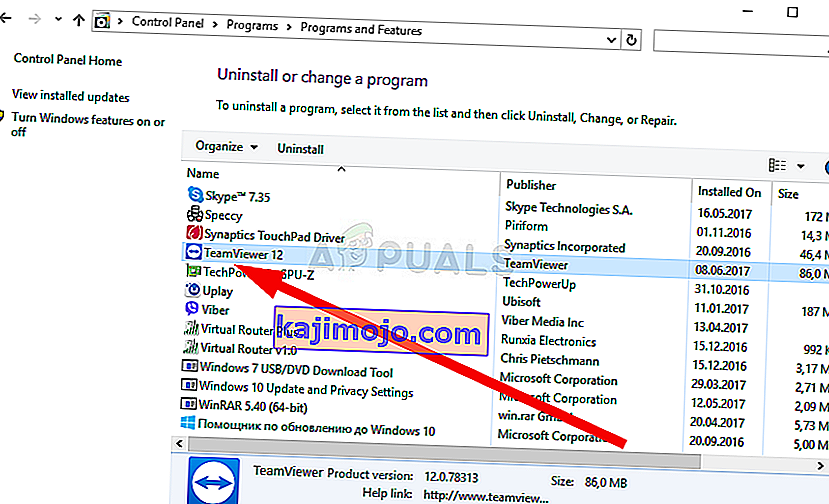
- Locate TeamViewer in Control Panel or Settings and click on Uninstall/Repair. Follow any instructions which appear afterward to uninstall it completely.
- Download the latest version of TeamViewer by visiting this link. Download its setup file, run it from the Downloads folder, follow the instructions on screen, and check to see if the problem persists after reinstalling TeamViewer!

