Nord VPN ir viens no vecākajiem spēlētājiem VPN pasaulē, un tā Windows lietojumprogramma tiek uzskatīta par vienu no labākajām datoru pasaulē. Nord VPN ir ļoti daudzveidīgs, ja runā par funkcionalitāti un elastību. Papildus starpplatformu atbalstam tam ir arī dažādi serveri, kas atrodas dažādās valstīs, lai jūs varētu izvēlēties.

Neskatoties uz to, ka lietojumprogramma ir bijusi tirgū diezgan ilgu laiku, lietotāji ziņo, ka nespēj izveidot savienojumu ar Nord VPN. Tas vai nu pārtrauc savienojumu pēc potenciālā atjauninājuma, vai arī pieprasījums DNS serveriem vai nu atgriež atbildi “noildze”.
Kas liek Nord VPN nepieslēgties?
Tā kā VPN izmanto visu datorsistēmas interneta arhitektūru, ir vairāki iemesli, kāpēc jūsu Nord VPN, iespējams, nevar pareizi izveidot savienojumu. Daži no tiem ir uzskaitīti zemāk.
- IPv6: Acīmredzot Nord VPN nevienā komunikācijā neatbalsta IPv6 protokolu. Tātad, ja tas ir iespējots, iespējams, nevarēsit izveidot savienojumu.
- Trešo pušu programmas: Ir zināms, ka trešo pušu programmas ir pretrunā ar programmatūras sistēmu un konkurē par resursiem; tādējādi liekot tai nepieslēgties pareizi.
- Tīkla adapteris: Tā kā Nord saziņai ar internetu izmanto atsevišķu tīkla adapteri, var gadīties, ka tīkla adapteris nedarbojas pareizi, un jums tas ir jārestartē.
- Kļūda tīklā: dažreiz datora tīkla konfigurācijas var būt kļūdas stāvoklī, kas vispār neizraisa savienojumu. Šajā gadījumā mēs varam mēģināt atsvaidzināt visus mainīgos.
Pirms sākam risinājumus, jums jāpārliecinās, vai jūsu internets patiešām darbojas . Ja jūsu internets nedarbojas pareizi, Nord nevarēs izveidot pareizu savienojumu un piešķirt jums piekļuvi tuneļa tīklam.
Pārliecinieties, vai izmantojat privātu tīklu (nevis skolu, darbu vai publiskas vietas, piemēram, slimnīcas) un vai nav iesaistīti starpnieki. Kad esat vēlreiz pārbaudījis, vai jūsu internets darbojas labi, turpiniet.
1. risinājums: IPv6 atspējošana
IPv6 (Internet Version Protocol 6) ir jaunākā IP versija datora tīkla arhitektūrā. Pēc noklusējuma mēs joprojām izmantojam IPv4 un joprojām neesam pastāvīgi pārgājuši uz IPv6. Tomēr, iespējams, ir daži no jums, kas ir sākuši izmantot IPv6 interneta savienojumam. Šķiet, ka IPv6 nedarbojas pareizi ar Nord VPN. Tādējādi mēs to atspējosim un pārbaudīsim vēlreiz.
- Ar peles labo pogu noklikšķiniet uz uzdevumjoslā esošās tīkla ikonas un atlasiet Atvērt tīkla un interneta iestatījumus . Tagad iestatījumos noklikšķiniet uz opcijas Mainīt adaptera opcijas .

- Atverot adaptera iestatījumus, ar peles labo pogu noklikšķiniet uz izmantotā adaptera un atlasiet Rekvizīti .
- Atverot adaptera rekvizītus, noņemiet atzīmi no opcijas IPv6 un pārliecinieties, vai ir iespējots IPv4. Saglabājiet izmaiņas un izejiet. Tagad restartējiet datoru un pārbaudiet, vai kļūda ir novērsta, un vai jūs varat izveidot savienojumu ar Nord VPN.

2. risinājums: trešo personu lietojumprogrammu pārbaude
Ir daudz citu lietojumprogrammu un programmu, kas, šķiet, ir pretrunā ar Nord VPN tās darbībā. Ja vairāk nekā viena lietojumprogramma mēģina piekļūt resursam, būs sacīkšu stāvoklis, un tie nedarbosies, kā paredzēts.

Jums vajadzētu atvērt uzdevumu pārvaldnieku (Windows + R un 'taskmgr') un pārbaudīt visas lietojumprogrammas, kas darbojas fonā. Viena no lietojumprogrammām, kas, kā zināms, radīja problēmas, bija Glasswire Elite . Mēģinot izveidot savienojumu ar Nord VPN, noteikti atinstalējiet to vai arī atspējojiet to.
Piezīme. Varat arī mēģināt notīrīt datora sāknēšanu. Tas atspējos visas ārējās trešo pušu lietojumprogrammas un palaidīs tikai nepieciešamās. Tagad varat mēģināt izveidot savienojumu. Ja jums veicas, tas nozīmē, ka problēmu izraisīja kāda lietojumprogramma. Varat atgriezties, iespējojot katru lietojumprogrammu un pārbaudot vēlreiz.
3. risinājums: servera atrašanās vietas maiņa
Nord VPN ļauj lietotājiem izvēlēties servera atrašanās vietu. Šie serveri ir izkaisīti visā pasaulē un nodrošina savienojamību atbilstoši to ģeogrāfiskajai atrašanās vietai, ti, sagaidāms, ka jums tuvāks serveris būs ātrāks. Mēs mēģināsim mainīt servera atrašanās vietu, kuru mēģināt izveidot savienojumu, un redzēsim, vai tas atrisina savienojuma neizveides problēmu.
- Palaidiet Nord VPN un noklikšķiniet uz virsraksta Serveri, kas atrodas lietojumprogrammas augšdaļā.

- Tagad atlasiet citu serveri nekā iepriekš, un pēc izvēles mēģiniet vēlreiz aktivizēt VPN. Ja jums rodas tāda pati darbība, mēģiniet izvēlēties citu serveri un pārbaudiet tīklu citā vietnē.
4. risinājums: tīkla / TAP adaptera restartēšana
Nord VPN creates a virtual network adapter on your computer which it can use to communicate information. It acts like a bridge in which Nord VPN modifies the settings so it can initiate and maintain a VPN connection. Sometimes this goes in an error state causing you not to connect with your VPN server. We will restart the adapter properly which will make sure that all the configurations of it are reinitiated.
- Press Windows + R, type “ncpa.cpl” in the dialogue box and press Enter.
- All the network adapters will be listed in front of you. Select the TAP adapter, right-click it and select Disable.

- After disabling it, wait for a minute. Then right-click it again and select Enable. Now try connecting Nord VPN and see if this does the trick.
Solution 5: Flushing Network Stack
There are countless examples where flushing (refreshing) the network stack on your computer solves various VPN related problems (including Nord). This process will flush your DNS and IP settings and make sure there are no improper settings that might be conflicting with the application.
- Press Windows + S, type “command prompt” in the dialogue box, right-click on the application and select Run as administrator.
- Once in an elevated command prompt, execute the following commands one by one followed by the Enter key after each command:
ipconfig /release ipconfig /flushdns ipconfig /renew netsh winsock reset netsh interface ipv4 reset netsh interface ipv6 reset netsh winsock reset catalog netsh int ipv4 reset reset.log netsh int ipv6 reset reset.log

- Now close the command prompt and try launching Nord VPN again. Check if you can connect with it properly.
Solution 6: Reinstalling Nord VPN (along with the TAP adapter)
If all the above methods don’t work, you need to make sure that your Nord installation is proper and there is nothing wrong with the installation files. The TAP adapter will also be reinstalled in the process because Nord VPN manages the adapter and it is only for its use. Make sure that you are logged in as an administrator. If reinstalling doesn’t work, make sure that your credentials are correct which you are entering the services have not expired.
- Press Windows + R, type “appwiz.cpl” in the dialogue box and press Enter.
- Once in the application manager, search for the entry Nord VPN from the list, right-click on it and select Uninstall.

- Now restart your computer and download the application again from Nord VPN’s official website. Now after entering your credentials, try connecting again and check if you can establish the VPN connection correctly.
Solution 7: Using an Alternative VPN Service
There are numerous VPN clients out there in the Windows market. However, we recommend or readers to try CyberGhost. This VPN service is as simple as it gets and also provides you with servers located at different countries. It even has separate VPN servers for streaming Netflix and BBC with ease. Follow the steps below to download the application and get your connection secure in no time.
- Download CyberGhost from (here).

- After downloading the VPN, install it on your computer. You might be asked for proper permissions. Make sure that you are logged in as an administrator and press Yes to all the permissions asked.
- After CyberGhost is installed on your computer, launch it. Here you will see a list of different servers available along with the distance from your actual location (more distance means slower internet).

- After selecting the server, click on the power button present at the right-hand side of the application. You can also select dedicated servers for torrenting and streaming (present at the left navigation pane).
Solution 8: Disable Firewall
In some cases, the default Windows Firewall might be preventing the application from working properly. Therefore, in this step, we will first be allowing it through the Firewall and make sure that it isn’t blocked by the Firewall and then we will also make sure that Windows Defender has it added as an exception. For that:
- Press “Windows” + “R” to launch the Run prompt.
- Type in “ControlPanel” and press “Enter” to launch the classical control panel interface.

- Click on the “View by:” button, select “Large Icons” and then click on the Windows Defender Firewall option.
- Select the “Allow an app orfeature through the Firewall” button on the left pane and then click on the “Change Settings” button and accept the prompt.
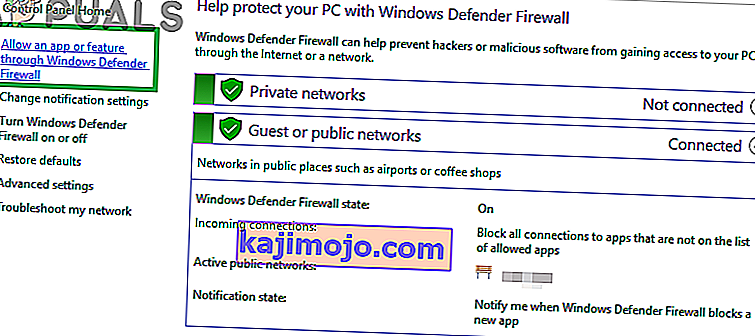
- From here, make sure that you check both the “Public” and the “Private” options for Nord VPN and its related applications/drivers.
- Save your changes and exit out of the window.
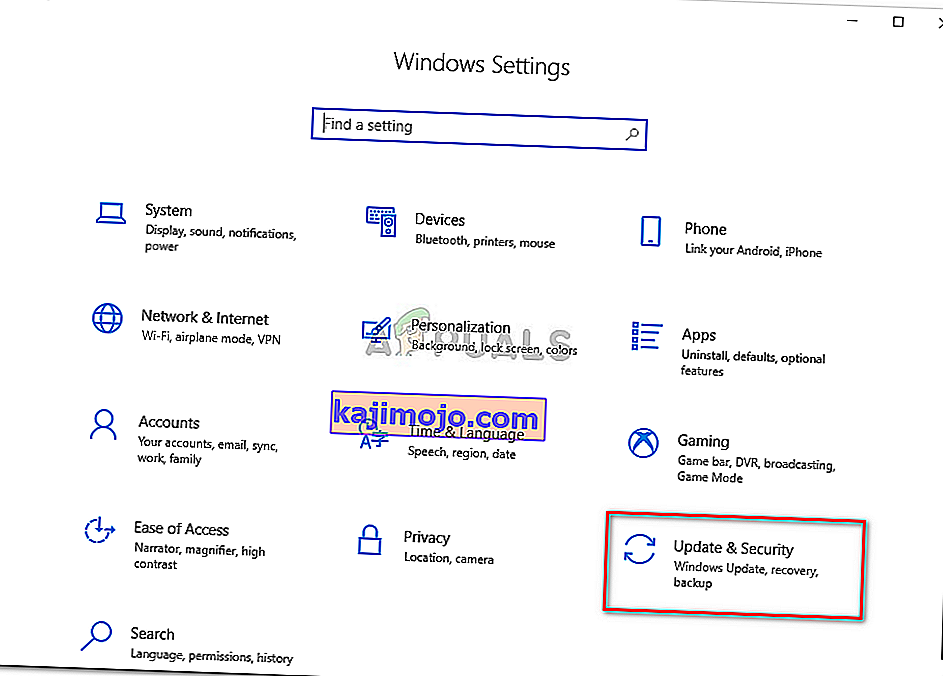
- After that, press “Windows” + “I” to launch the settings and click on the “Updateand Security” option.
- From the left pane, click on the “Windows Security” button and then click on the “Virus and Threat Protection” button.
- Select the “Manage Settings” button under the Virus and Threat Protection Settings heading.
- Scroll down and click on the “Add or Remove Exclusions” button in the next window.
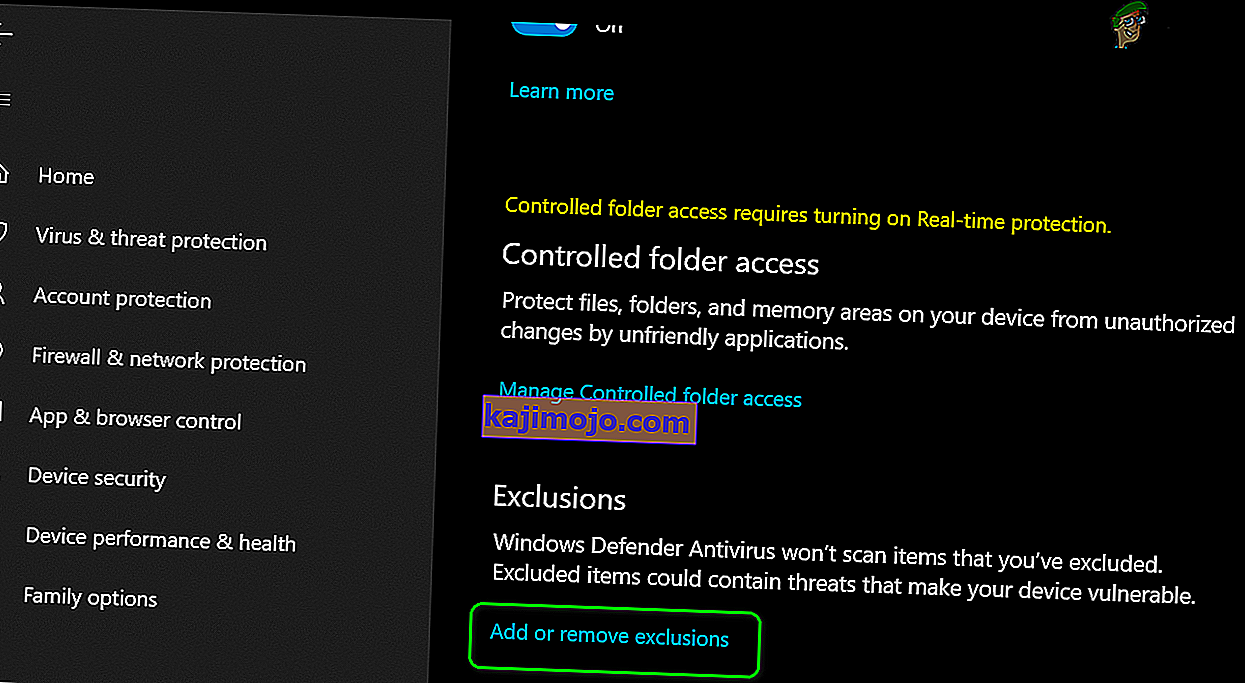
- Click on the “Add an Exclusion” option and select “Folder’ from the File type.
- Make sure to specify the Nord VPN folder and exit out of this window after saving your changes
- Check and see if doing so has fixed the issue with Nord VPN not connecting.


Solution 9: Change NordVPN Protocol
It is possible that Nord VPN might be running into issues while trying to connect to its servers due to the protocol configuration in its settings. If one type of protocol isn’t working for you, it is always recommended to try and switch to the other protocol to make sure that the issue isn’t tied to the wrong selection of the protocol type automatically or manually. For that:
- Launch NordVPN and make sure to disconnect from any currently active sessions.
- Click on the “Gear” icon on the top right corner and go into the settings.
- Click on the “Advanced” option from the left-hand side menu.
- Click on the “Protocol” dropdown and check on “TCP”.
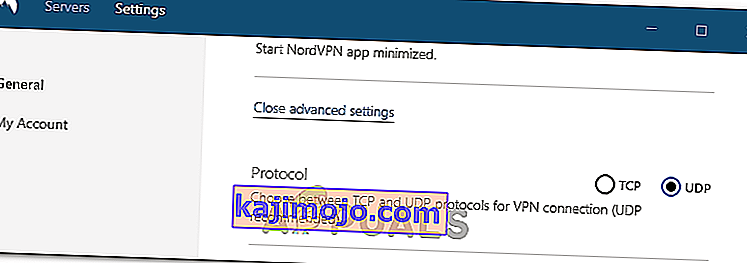
- This should change your protocol from TCP to UDP.
- Check to see if doing so fixes the issue for your computer.
- To Verify that none of the protocols work, make sure to repeat the steps and select “UDP” instead of TCP and then check again.
- If none of the selected protocols are able to make a connection with the server, move on to the other fixes.

Solution 10: Changing DNS Server Configuration
DNS Servers are used by the computer to establish a stable and secure internet connection with other sites on the internet, however, if the computer is unable to detect the DNS settings properly, or if the selected DNS server is facing outage, Nord VPN might not connect properly. Therefore, in this step, we will be changing the DNS configuration to ensure that DNS isn’t an issue. For that:
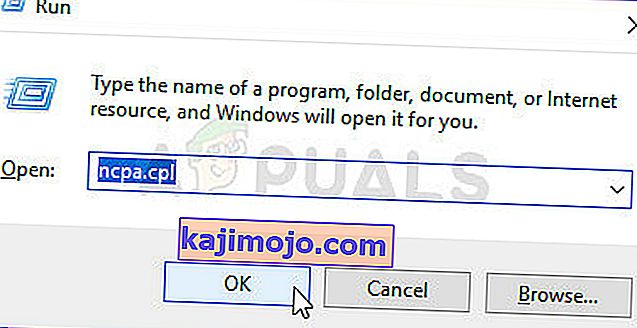
- Press “Windows” + “R” to launch the Run prompt.
- Type in “ncpa.cpl” and press “Enter” on the keyboard to launch the network configuration panel.
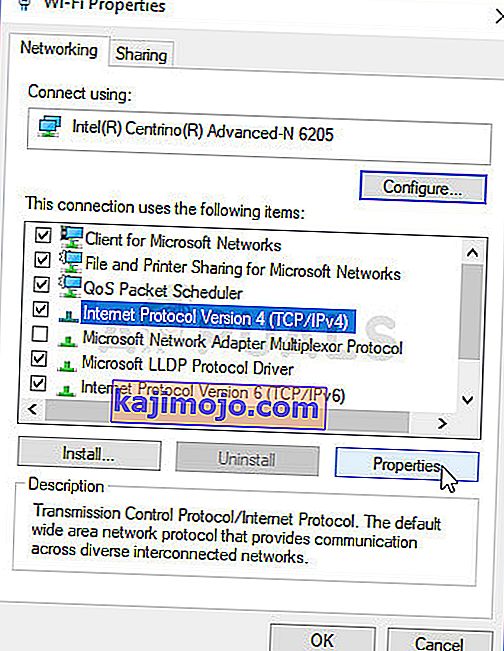
- Right-click on your internet connection and select the “Properties” option.
- Double click on the “Internet Protocol Version4 (TCP/IPV4)” option and check on the “Use the following DNS addresses” button.
- At first, type in “8.8.8.8” and “8.8.4.4” in the primary and the secondary DNS addresses field respectively and click on “OK”. After that, check to see if NordVPN is connecting, if it isn’t, try to use “103.86.96.100” and “103.86.99.100” in the primary and the secondary fields respectively.
- Check to see if you are able to make a connection by selecting those DNS servers.


Solution 11: Opening Ports
For some people, the issue might arise if the ports that NordVPN uses to communicate with its servers are being blocked by your router. For security reasons most routers often block ports used by VPN/Network Tools to prevent any alterations to your connections and if that is the case, we will have to open the ports by logging in to the router’s control panel. For that:
- Press “Windows” + “R” to launch the Run prompt and type in “cmd” and then press “Ctrl” + “Shift’ + “Enter” keys on your keyboard to provide admin permissions.

- Type in the following command in the command prompt to list the IP information.
ipconfig /all
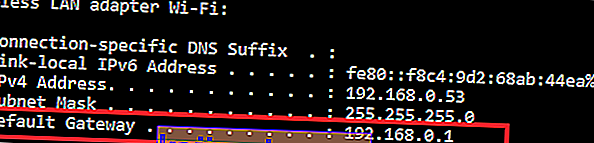
- The computer will list all the information of the network adapters connected to your computer.
- Under the default gateway option, after the mac address, there should be an IP address that should look something like “192.168.x.x”.
- Copy this IP address and launch your browser.
- Paste the IP address within a new tab on the browser and press “Enter” to navigate to the browser’s login page.
- Once on the login page, log into the control panel with your credentials, both of which, i.e the username and password should be written on the back of your internet router. If not, then the username should be admin and the password should be the Wifi password that you use to connect your devices.
- After logging into the Control panel, look around for a “NAT” or “Port” option that allows you to forward ports.
- Type in “500” and select “UDP” from the list.
- Click on “Save” to forward the 500 UDP port and exit out of the control panel after the change has been made.
- Try connecting with Nord VPN and check to see if the issue persists.


Solution 12: Use Hotspot
Mostly, this error can be fixed simply by employing your mobile’s hotspot connection instead of the Wifi or the Wired connection that you are already using on your computer. This does seem an inconvenience for Data conscious people but it seems to be the only way some people are able to connect through Nord VPN as some routers block it completely.
Note: In addition to this, you can try to change the firmware on your router to avoid any permanent blocks put from the router or to eliminate any bugs with the connection.